Your GUide to Building your corechair ELITE
Build Your Corechair ELITe
See below for video instructions of your assembly, as well as setting up the chair for a perfect fit. Or continue past the videos for written instructions.
Written Instructions
For safe and efficient assembly, we recommend having two people work together when building this chair.
Instructions:
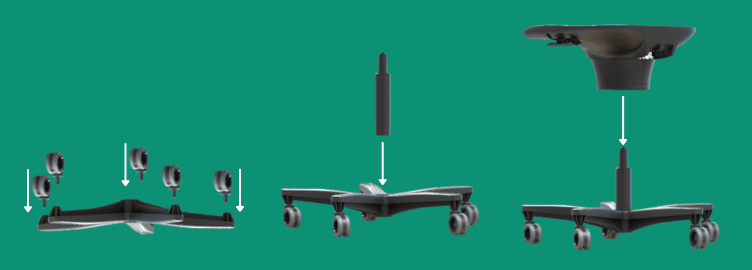
1. Retrieve base and place it upside down
2. Install casters (Note: The wheels will take some extra force, don’t worry they won’t break.) For additional support watch our install video below for technique.

3. Flip the base back over so that the wheels are now on the floor and install the gas cylinder
4. Install seat / mechanism onto the top of the gas cylinder and remove cushion from seat (if you have difficulty removing the cushion, use a flat object to pry open the front left corner).
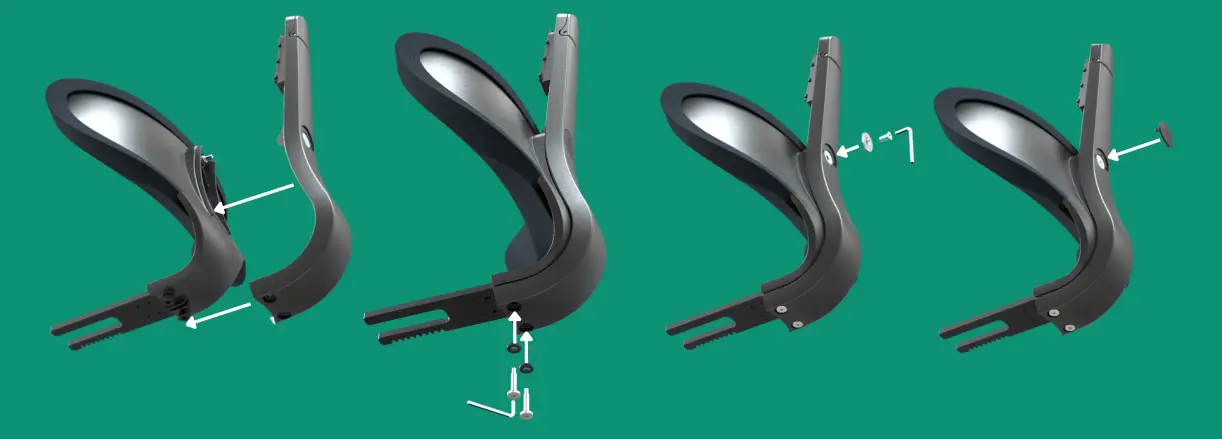
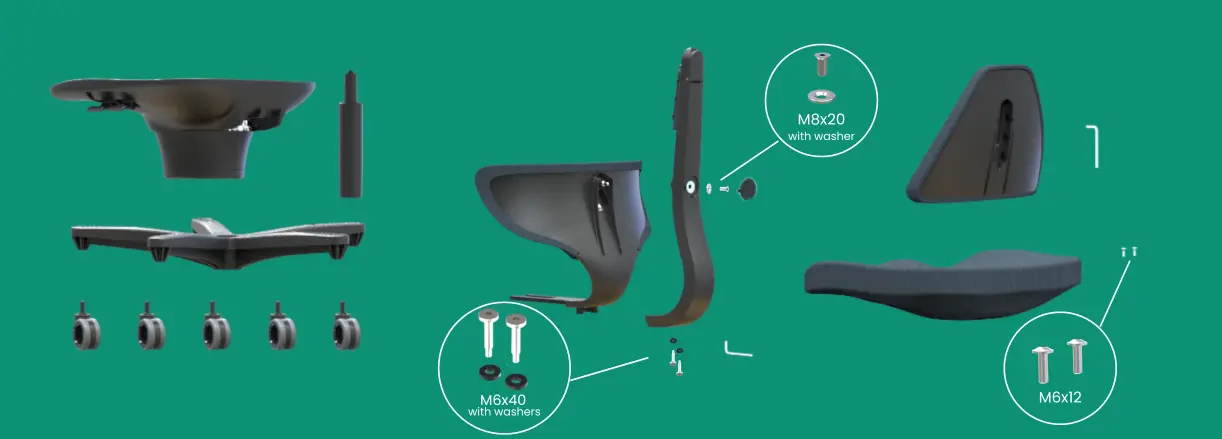
5. Place the pelvic stabilizer front-side down on the floor. Fit the Clever spine to the back of the pelvic stabilizer.
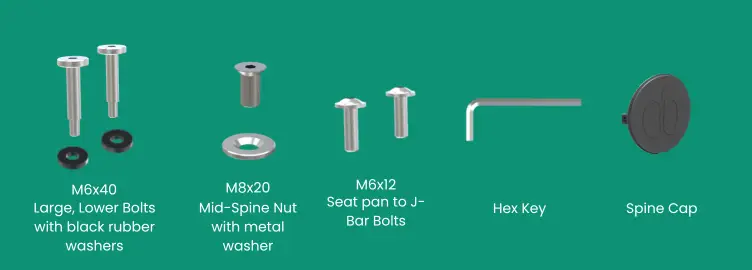
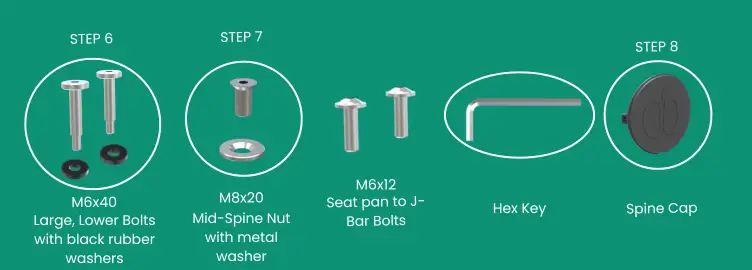
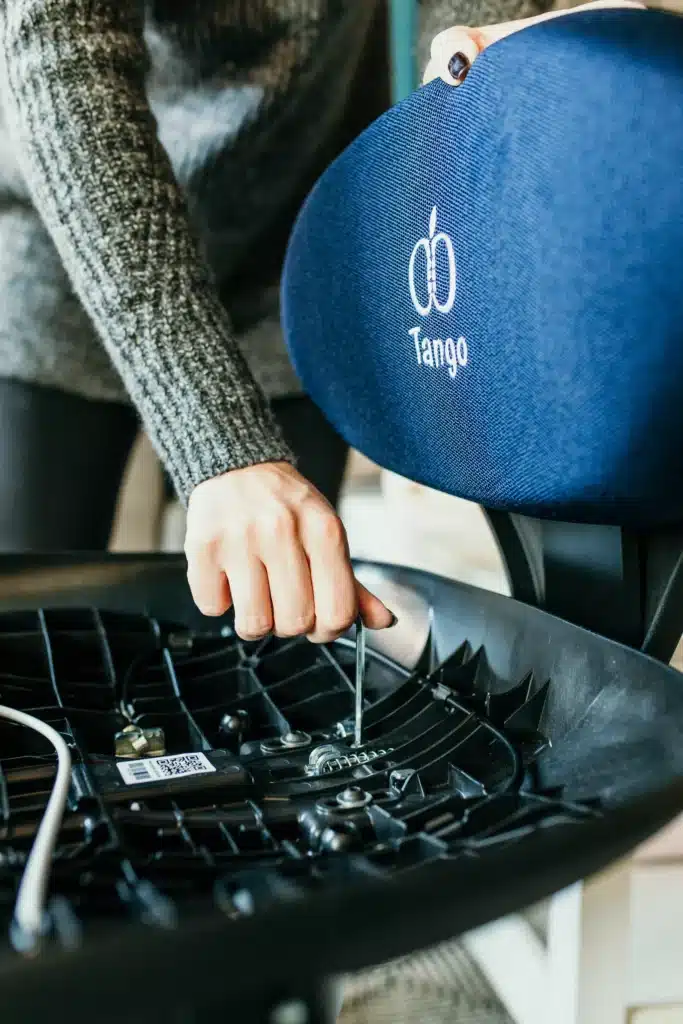
6. Using the Hex key found under the seat cushion, in the seat pan; secure the bottom of the Clever spine by inserting the long (M6x40) bolts with the rubber washers into the two holes.
7. Secure the middle of the Clever spine by placing the small nut and washer (M8x20) through the hole and onto the threaded attachment inside.
8. Place cap over over hole to cover nut.
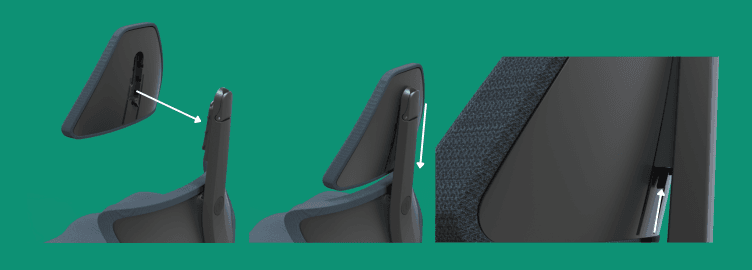
BACK INSTALLATION

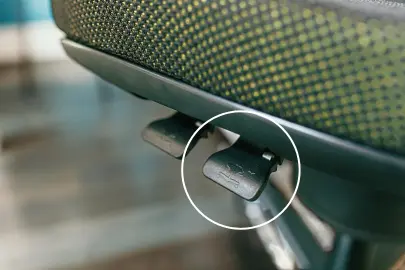
9. Have one person hold the chair in place or push the chair up against a solid barrier such as a wall or piece of furniture. Lift rear lever on the Left side and insert the heavy metal bar (attached to the back rest) into the back of the seat / mechanism. Slide the metal bar all the way forward.
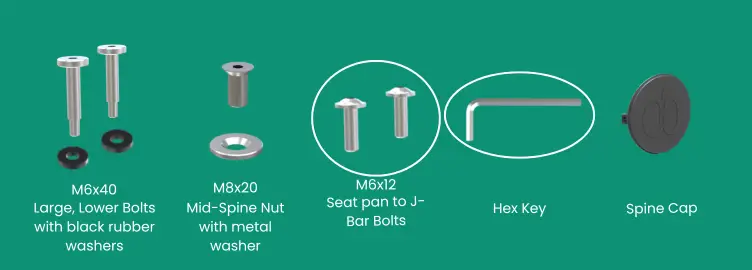
- You should be able to see threaded holes that will accept the short bolts that are designed to secure the back to the seat.
- Use hex key found in the seat pan to install the short bolts.
- Once installed snuggly, you will still be able to move the back in and out by lifting the same lever.
11. Place hex key back in the seat, and lift rear lever. Slide backrest as far back as possible and then release rear lever.
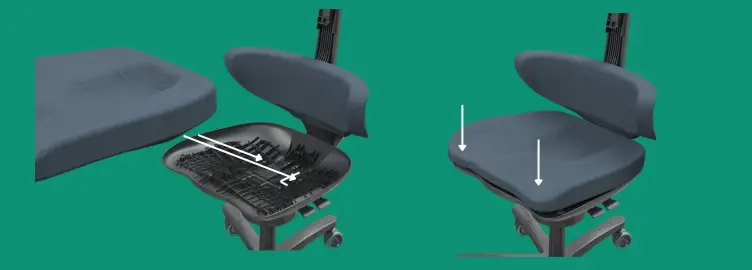
12. Reinstall the seat cushion by lining up the four socket connections on the underside of the seat cushion, onto the four ball connections on the seat pan. Be sure to click down the front corners of the cushion.
13. Attach the upper thoracic support by lining it up with the Clever spine, and sliding it down into place.
14. Lock it into place by switching the locking lever found underneath the connection. Note: This lever is only required for assembly, so it may be tricky to reach. Once set, you should not have to move it again.
15. Test the height adjustment by releasing the lever on the top, backside of the spine. Note: Most will find they do not need this section raised higher.
16. Now that your CoreChair Elite is assembled, follow along to our fitting instructions to ensure a proper ergonomic fit.
If you need additional assistance please contact us.

Tutorial
Video Library
Learn more about your CoreChair and build your perfect set-up.